
Maintenance State

The Maintenance State section can be used to register all the components that make up the machine. For each of them, specific information is displayed and their maintenance status is tracked.
Within the page, components are organized hierarchically, divided into groups and subgroups. Groups can contain multiple subgroups, while subgroups can include a set of components.
For each component, one or more counters can be defined in order to dynamically calculate residual health. A dedicated function allows you to define which of these counters should be used to determine the health status of the component itself.
Adding Groups and Subgroups

In Image B, the selector that allows adding groups, subgroups, and components to the page is highlighted.


Images C and D show the windows used to create new groups and subgroups, respectively. For these elements, a unique code must be entered along with translations of the object name in all project languages. These translations will be used to display the object on the page and in all places where it is referenced. Note that subgroups must always be linked to a group through the dedicated selector. Groups and subgroups can exist even if they contain no components.
Adding Components and Counters

Image E shows the window used to create a new component. The fields that can be filled in are as follows:
Image: a dedicated selector allows you to upload an image for the component. By clicking Select Image, a new window opens showing all the images uploaded for the selected asset. Here you can upload new images from your file system or select one to associate with the component. For more details, please refer to the dedicated documentation;
Group: this field allows you to choose the group to which the component belongs from existing groups;
Subgroup: this field allows you to choose the subgroup to which the component belongs from existing subgroups;
Component Code: here you must specify the unique code of the component being created;
Installation Date: represents the date on which the component was installed, i.e., the point from which its counters begin updating to calculate health status;
Translations: translations for the component in all project languages must be provided, and will be used wherever the component is referenced;
Counter Aggregation Strategy: this field allows you to select from a set of predefined functions the one to use to dynamically determine the reference counter for calculating the component’s useful life.
At the bottom of the window, there is a button that allows you to add one or more counters to the component (Image F). Note that a component may also have no counters.

For each counter, the following fields must be specified:
Counter Code: unique code identifying the counter;
Reference KPI: value or formula used for counting. Note that usable KPIs depend on the machine configuration. In addition, each asset includes the “Absolute Time” counter, which measures elapsed time;
Expected Lifetime: threshold value beyond which the component is considered at end of life;
Subcritical Threshold: first threshold beyond which the component is considered subcritical;
Critical Threshold: threshold beyond which the component is considered critical and near end of life. When a component is critical, it is displayed in red on the page;
Translations: the counter name must be provided in all project languages. This name will be used whenever the counter is referenced.
Image Upload

The button highlighted in Image G is located inside the window for creating a new component or modifying an existing one. Clicking it opens a new view as shown in Image H.

To associate an image with a component, two steps are required:
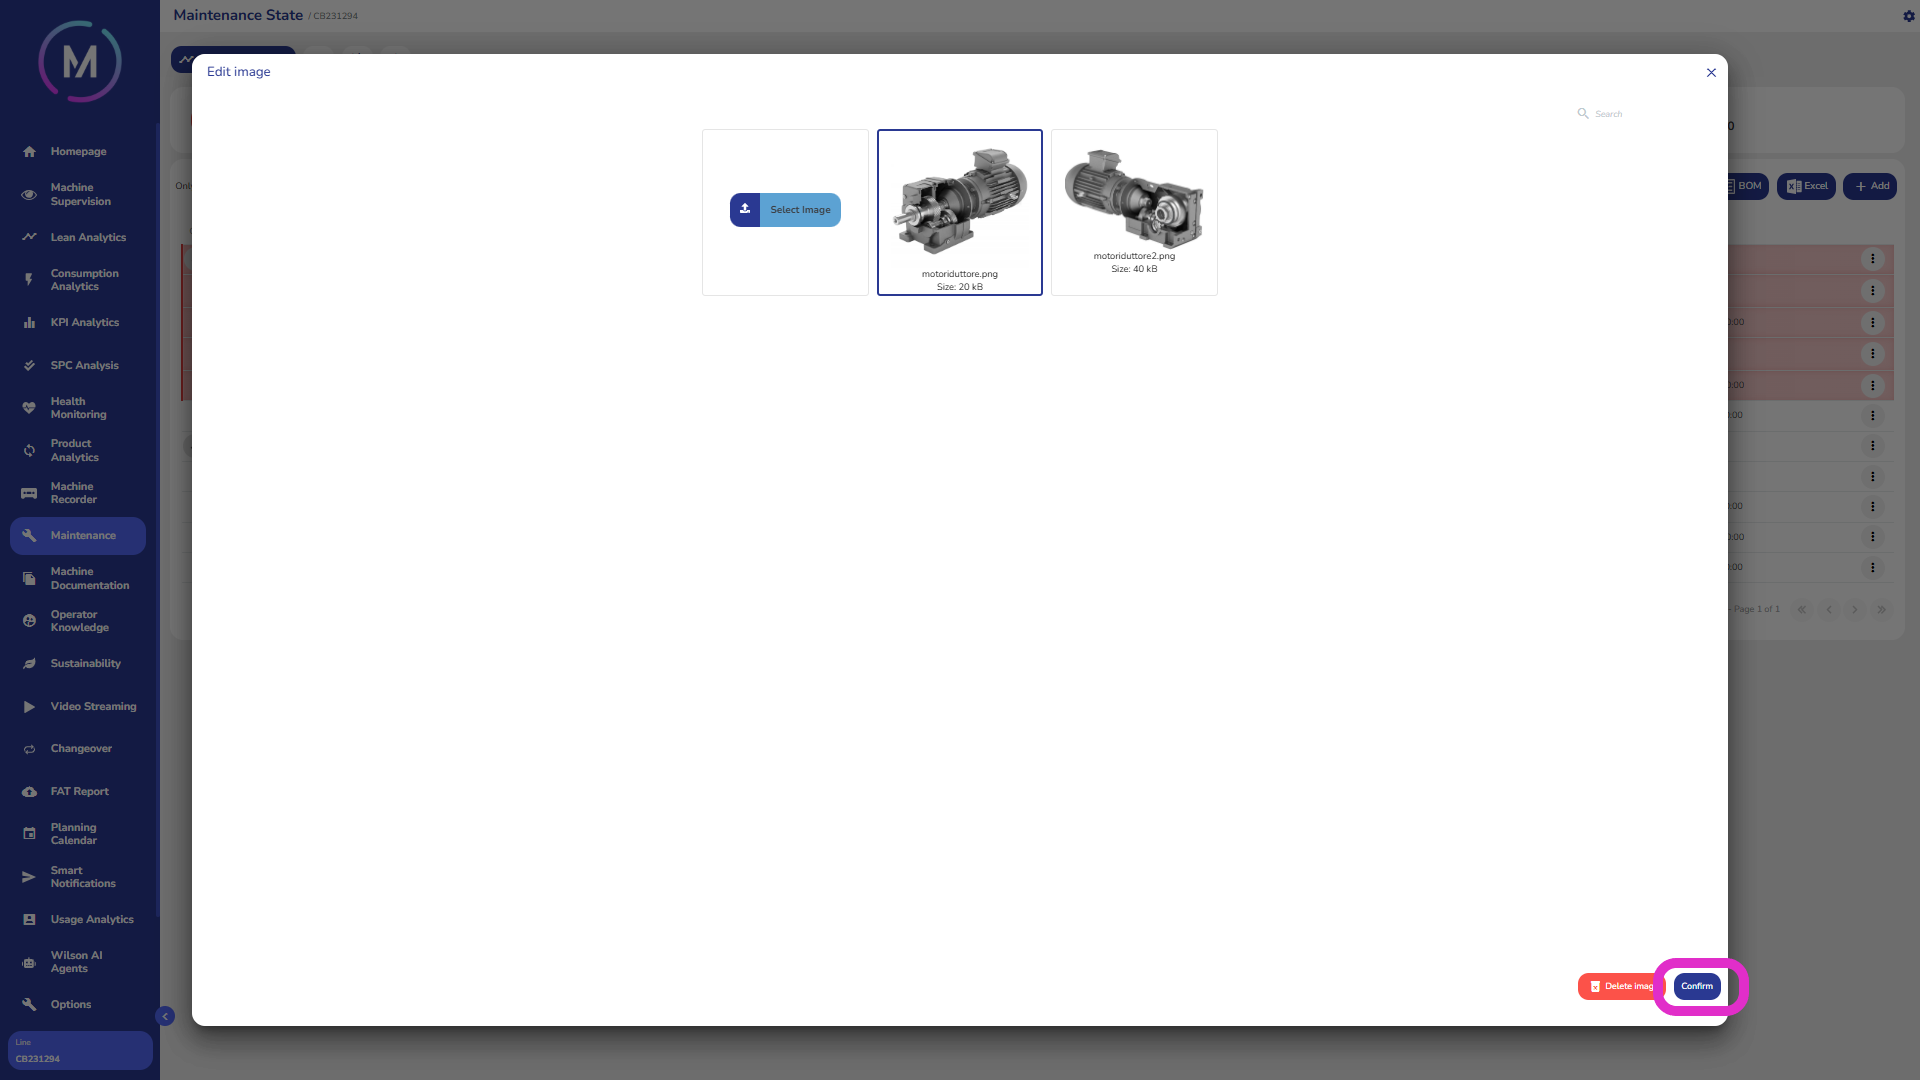
Step 1 – Upload the image to the asset’s image collection (optional): the window in Image H displays all images uploaded for the asset. The highlighted button allows you to access your computer’s file system to select files to upload. Once a file is selected, the upload button will appear, as shown in Image L;


Step 2 – Associate a file with the component: all files uploaded for the asset will be shown in the Image H window and can be selected to be associated with the relevant component. After selecting the desired image, you must use the button highlighted in Image M to confirm the operation.
Group and Subgroup Management
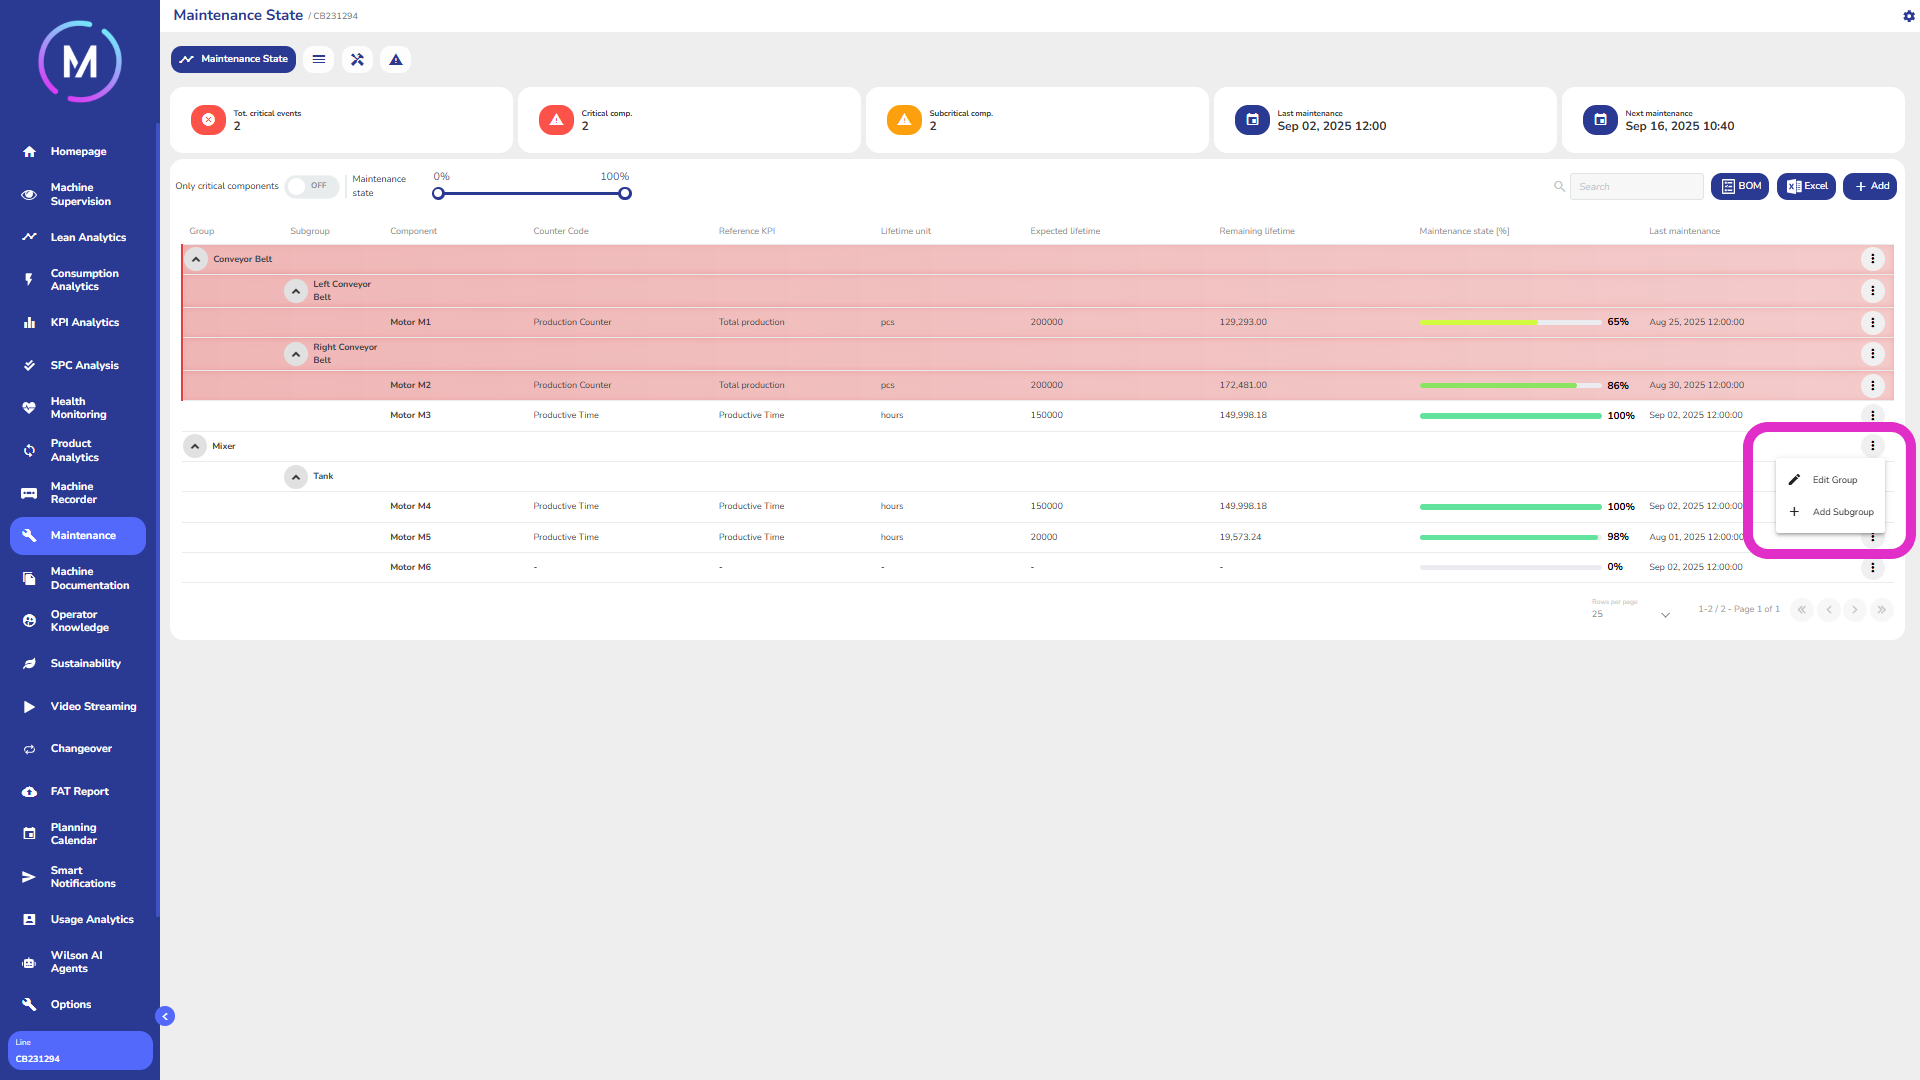

For both existing groups and subgroups, certain operations can be performed (Image N, Image O). Specifically, existing groups can be modified, or new subgroups belonging to them can be created. Existing subgroups can also be modified, and components can be added to them. An object (group or subgroup) can only be deleted if it no longer contains any other objects.
Component Management
Certain operations can be performed on all existing components (Image P):

A component can be modified. The Modify Component button takes the user to a view similar to the creation view. Here, both component data and all its counters can be modified.
A component can always be deleted. If maintenance records or activities are linked to it, the component will be hidden from view but will remain within the connected objects.
Component Detail
Each component has its own detail section, as shown in Image Q.

At the top of the window, all detailed information about the component can be viewed.
The central card shows all counters configured for the component, each displaying its current status dynamically updated.
At the bottom of the window, the full history of maintenance performed on the component is displayed. For each maintenance activity, the status of the reference counter in use at the time is shown.
Bill of Materials - BOM
The BOM button allows you to generate a Bill of Materials, either customized or automatic:
Automatic BOM: the current day is assumed as the verification date, and the user is asked to choose the components to include in the order. Finally, the user can customize the e-mail text and recipient addresses. The BOM file can also be downloaded in PDF format;
Customized BOM: the user is asked to select a time range within which to forecast the end-of-life. After choosing the components to include in the order, the user can customize the e-mail text and recipient addresses. The BOM file can also be downloaded in PDF format.
Excel Catalog Upload
The Excel button allows you to either import or download an Excel file containing group, subgroup, or component data.
Importing the Excel file means uploading new components into the system or bulk editing existing ones.
Downloading the Excel file means exporting the data of components, groups, and subgroups currently in the application in Excel format.
For more information on how the files must be structured and completed, please refer to the dedicated documentation.