
Documentation
Depending on the purpose for which the Machine Documentation module is used, different functionalities are available.
Basic Configuration

In its basic configuration, this module allows for the uploading of files from one's own device to cloud storage. An interface is provided that simplifies and centralizes document uploading. In addition to being able to upload and delete files, it is possible to create and delete folders, download previously uploaded files to a local device, and view them online through a PDF reader. Within the reader, modifications can be made to the original file.

After each action, a confirmation is requested. At this stage, the user can choose to notify all contacts specified in the relevant mailing list via email. The mailing list is configured on the Settings page.


Complete Configuration
In this second version, the page is enhanced with a series of functionalities that allow the performance of FAT (Factory Acceptance Test), SAT (Site Acceptance Test), and IAT (Internal Acceptance Test), depending on the configuration settings of the application.
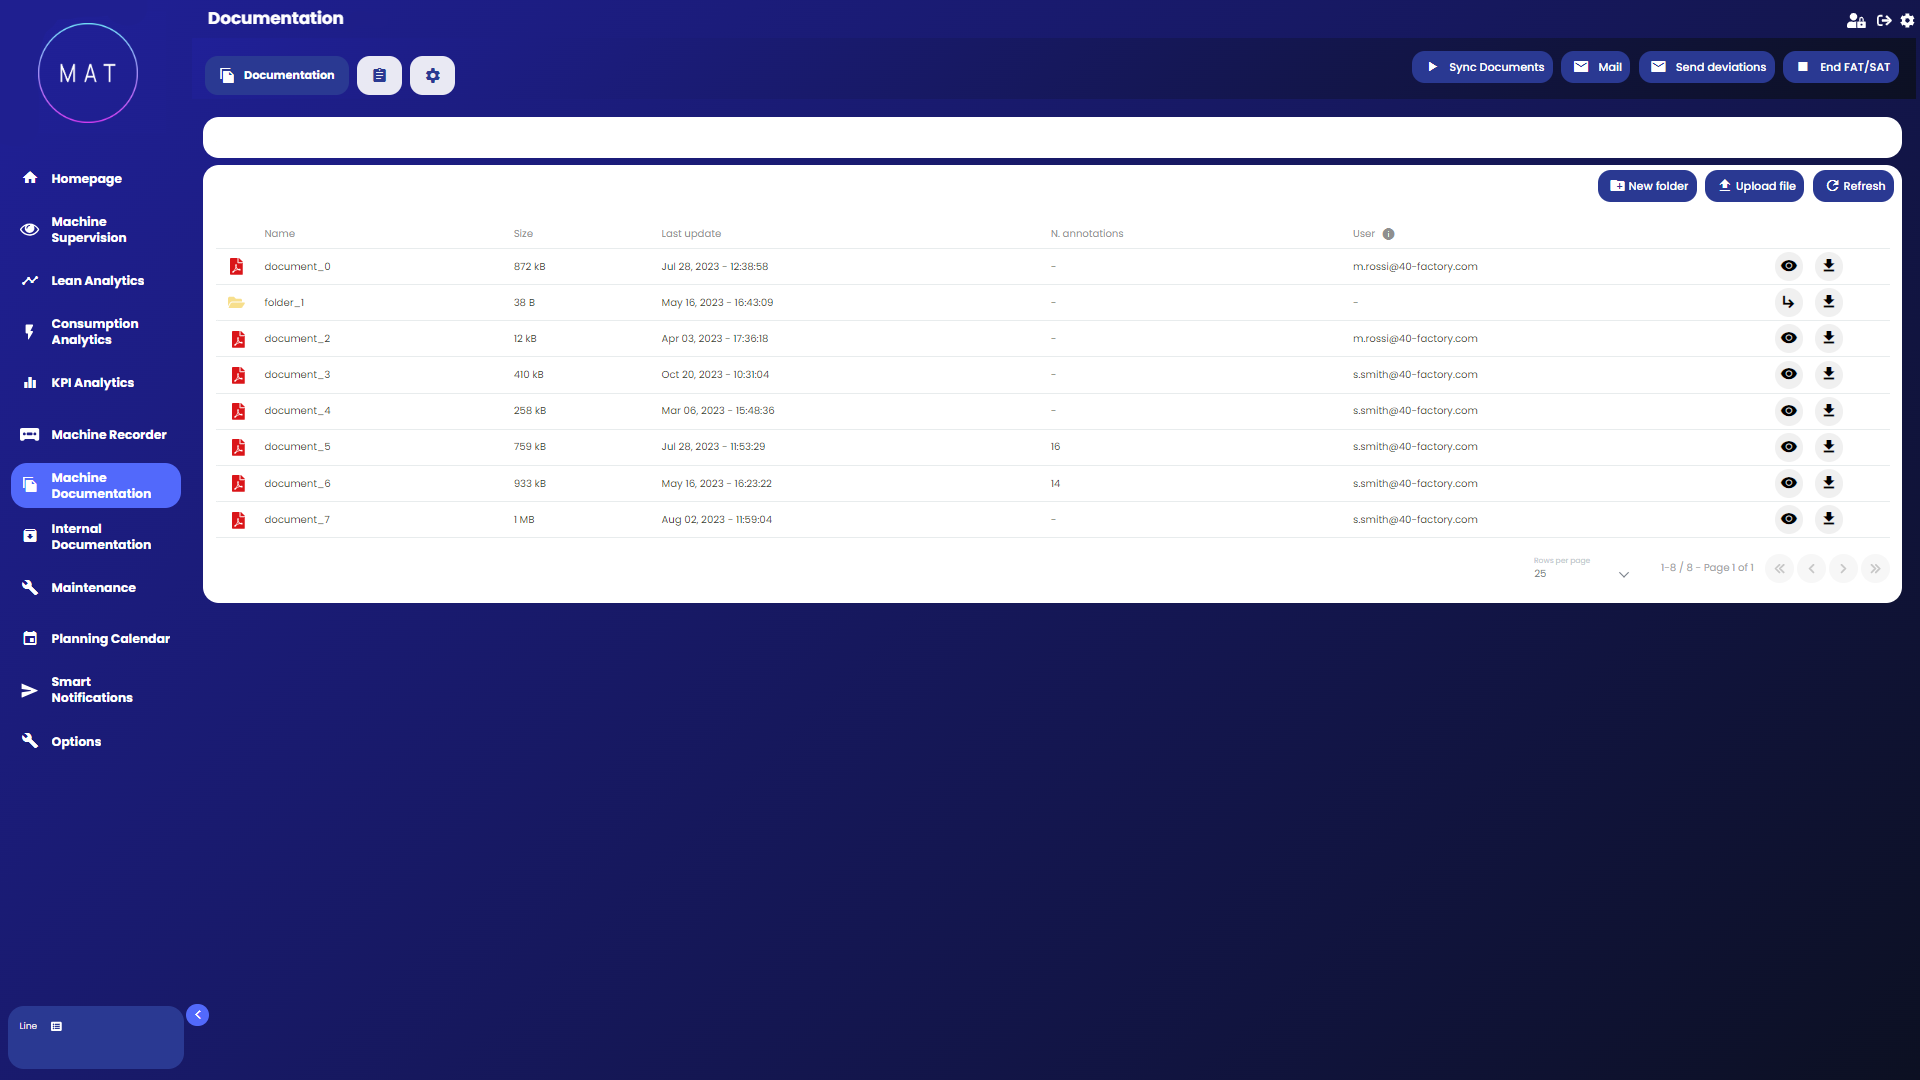
As seen in the image, functionalities previously described regarding the uploading and deletion of files, and the notification of interested parties about operations performed by a user, are maintained. Additionally, during configuration, it is possible to associate with the page a shared folder located in a defined user's location, the content of which can be synchronized to the platform using a dedicated synchronization button. This action searches on SharePoint for the folder named after the asset's project number (e.g., “4203”) and within it the folder relating to the ongoing procedure (“FAT” or “SAT”). Each document is then scanned, and if the file name complies with the configured naming rules, it is transferred to the cloud and made available on the webapp within a folder named "FAT" or "SAT," depending on the procedure.
Once all files are uploaded, the synchronization can be stopped using the "End FAT/SAT" button. A window appears where one can decide whether to set the automatic deletion of files in the relevant folder (FAT or SAT) after a configurable number of days or to keep the folder in the cloud indefinitely. Once the action is confirmed, the related folder is locked and made available exclusively in read/download mode. It is no longer possible to modify the files in that folder or upload new ones. The entire folder remains downloadable, in the case of activated deletion, within and no later than the specified number of days.
In addition to notifications on the uploading and deletion of a file, the user can choose to send to the entire mailing list set up in the Settings section a notification with a summary of the files present in the cloud. One can also decide to send all the information related to the annotations made by the user who performed them.
The application keeps a history in which all operations performed and their results are listed. The list of activities can be viewed in the History section.
It is worth nothing that, for FAT/SAT procedures, different functionalities can be enabled for different user groups, thus ensuring the correct management of operation flows among actors.
Standard Procedure for FAT/SAT via MAT.
Steps to follow for FAT procedure:
synchronize files from the document collection folder using the "Sync Documents" button;
move to the History section to check the result of the operation just performed. If the icon is green, the operation was successful; otherwise, repeat the operation;
notify your clients of the recent upload using the "Mail" button in the Documentation section, which should only be enabled for the manufacturer. Now the client has access to the documents;
once the FAT is concluded, click the "End FAT/SAT" button and choose the file deletion mode. Once the action is confirmed, the related folder will be made available in read/download mode only.
Steps to follow for SAT procedure:
switch to SAT mode using the appropriate button on the screen;
view, modify, or download the necessary files;
notify the manufacturer of the changes made using the "Send Deviations" button.