
Settings
Configuring mailing lists
In the subsection Configuration there is a Recipient List section at the top in which you can add notification recipients:

In the Recipient List section, click the "+" button in the upper right corner;
type in the desired email address;
you can add more recipients by clicking on the "+" button in the upper right corner;
to save the recipients you entered, press the Save button in the upper right corner.

The highlighted button in Image B allows you to customize the notification settings for the referenced email. Among the various options, we find:
the ability to choose the language in which to receive the notification;
the ability to set the unit of measurement associated with the data in the notification;
the ability to request a notification in case of machine disconnection.
Additionally, among the settings, there is a checkbox called "Receive email for all alerts" that allows you to receive emails for all notifications set up in the system. Alternatively, you can configure the list of emails to send each notification to for each notification. In Image C, the view after clicking the button is shown.

Saving is possible if email addresses have been entered in the recipient fields following the correct syntax.
Mailing list entry is an action enabled only for users with Cloud-hosted application.
Event notification configuration
Events can be configured, based on:
numeric variable,
boolean variable,
KPI (Key Performance Indicator).
Alarms, Warnings, and Maintenance events can also be used to set up a notification.
To enter a smart notification, simply click the "+" button in the Smart Notification Configuration subsection, and enter the data in the dialog that appears.
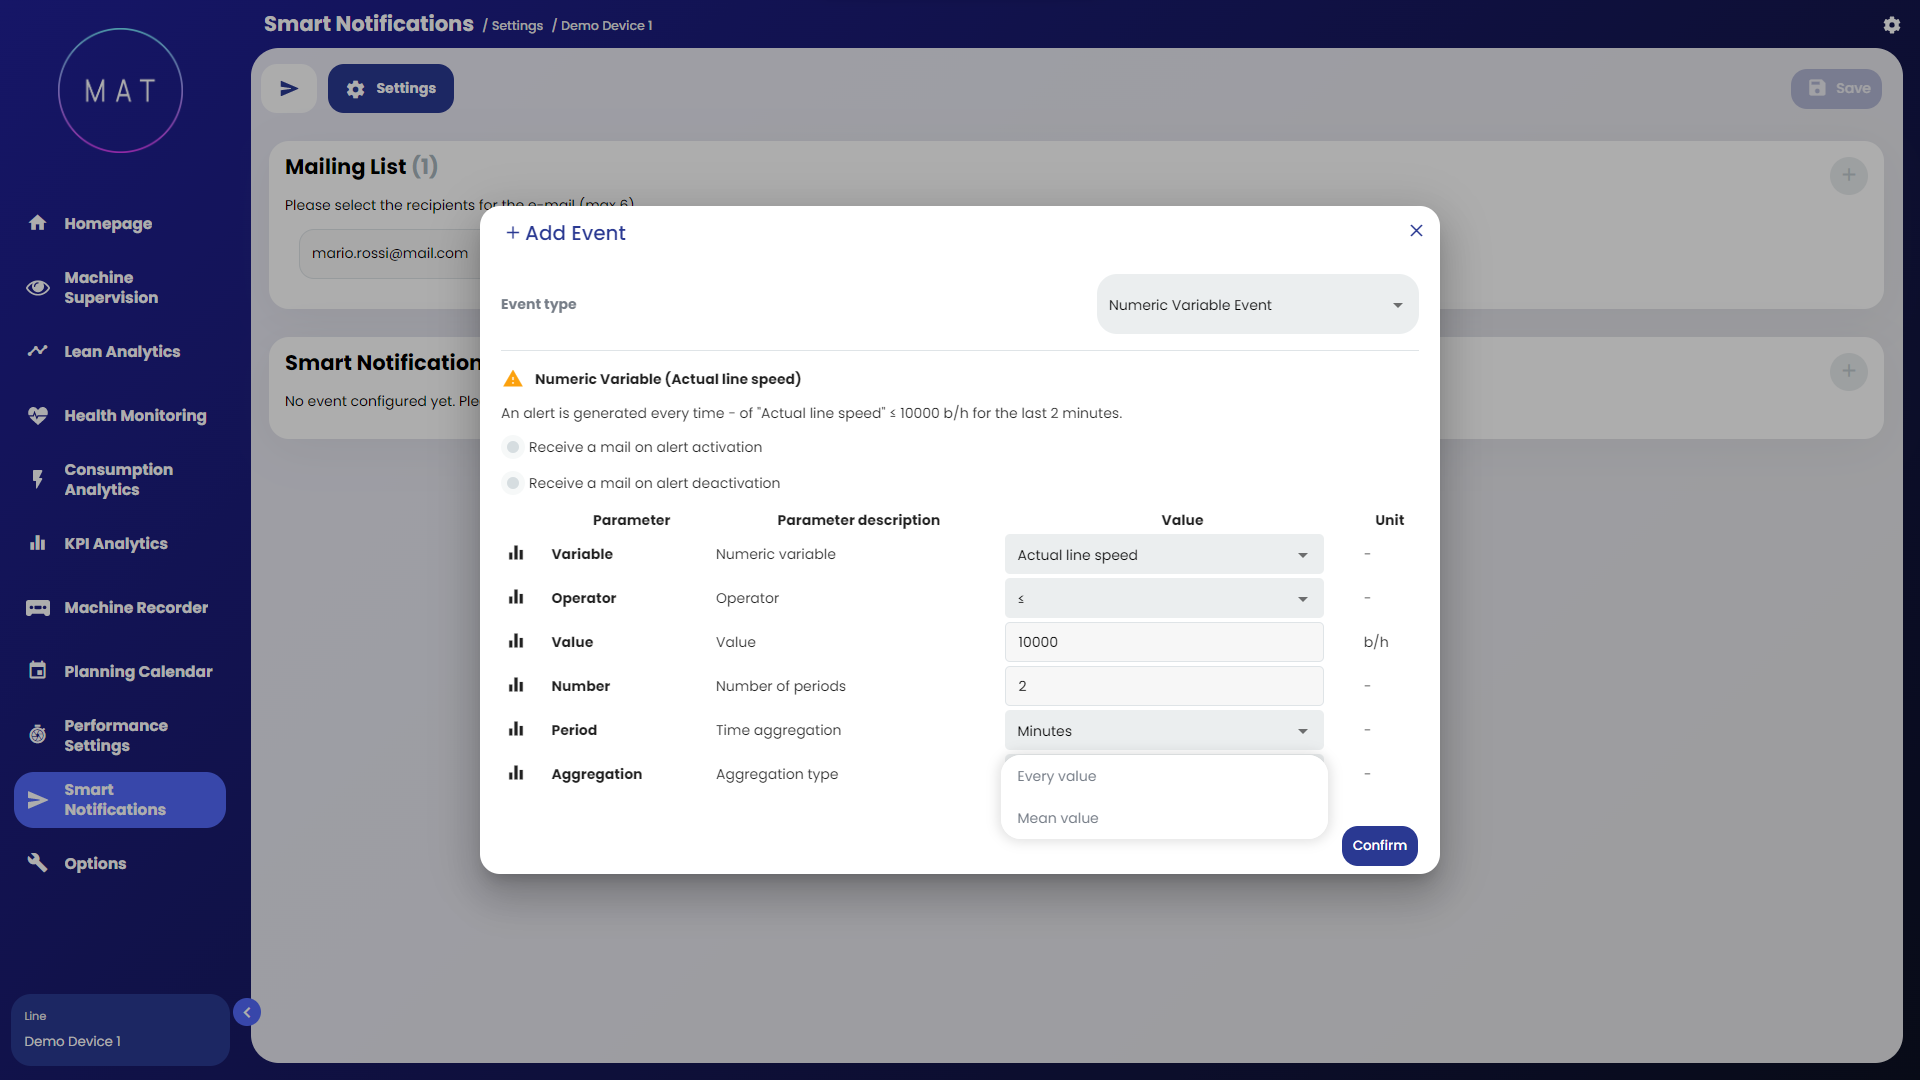
The fields to be filled in for setting up a notification are:
variable: selectable according to the event type choice,
operator: comparison operator (>, <, =, ...),
value,
number of periods,
period: time aggregation (minutes, hours, days),
aggregation: type of aggregation (e.g., each value, average value).
Note that for each notification, you can enter a customized list of email addresses. Both the addresses specified here and those configured globally with the "Receive mail for all alerts" option will receive the notification.
Numeric variable
To set a tolerance threshold related to a numeric variable:
select the type of event Numeric variable;
check the desired option (Receive an email on alert activation/deactivation);
complete all fields;
click Confirm.
With the Aggregation parameter you can choose whether to receive notification whenever the value of the variable exceeds or falls below the indicated value, or, whenever the average obtained from changes in the value of the variable exceeds or falls below the indicated threshold.
Boolean Variable
To set a tolerance threshold related to a Boolean variable:
select the Boolean Variable event type;
check the desired option (Receive an email on alert activation/deactivation);
complete all fields;
click Confirm .
KPI
To set a tolerance threshold related to a KPI:
select the KPI event type;
check the desired option (Receive an email on alert activation/deactivation);
complete all fields;
click Confirm.
Alarms and Warnings
To set an Alarm or Warning event as the notification trigger:
select the event type (Alarm or Warning),
choose the Alarm or Warning type from the provided list,
choose the duration and length of the event period after which to send the notification,
click Confirm.